Intro to Web Design (Part 2): Building a Content Layer with HTML
February 4th, 2009 in Design Tips & Tutorials
by: Matthew Griffin
In the first part of this series I gave an overview of the foundational concepts of web design. Most of the article was spent explaining the separation of content from style that is so unique to the web. In this second article I'll be giving a brief tour of the content layer: what it is, how it's created, how it should be structured, etc. This is not a detailed HTML reference guide but I would highly recommend reading it before you go off reading a tedious reference manual. This is a starting point—an assistant to help you get your mind wrapped around the big picture before you start worrying about the details. By the end of this article, you should be able to create a simple HTML web page—the first building block in web design. As I mentioned in the first article, this series is perfect for newbies but there are some veterans out there who could use a quick lesson.

What is an HTML Web Page
Web pages are written in a special markup language called HTML. Many times the uneducated outsider bundles HTML (Hyper Text Markup Language) together with programming languages like C++, PHP, or Java. But HTML is not a programming language. It's simply a set of "tags" placed in a plain text document to describe content. For example, let's say I want to create an HTML page that's about the history of my company. The content I have is very simple: just a page title and some body copy. Something like this:
The History of A-1 Widget Makers
A-1 Widget Makers has been family owned since 1943. We make the best widgets in the West Texas areas and we'll beat any competitor's price.
Without proper HTML tags, this content is just one big pile of text. Other than the fact that the title appears before the body copy, there is no way to distinguish between the two. But when we "tag" each block of content properly, the content becomes meaningful. HTML tags make it easier for search engines to tell what's important on each web page and they create reference points that will allow the style layer to dictate what each area of content will look like to a visitor.
In the example above there are two types of content: title and body copy. The HTML tag for the most important header on the page is <h1>. And the HTML tag for body copy (paragraph) is <p>. So when the content is wrapped in corresponding HTML tags it will look something like this:
<h1>The History of A-1 Widget Makers</h1>
<p>A-1 Widget Makers has beenfamily owned since 1943. We make the best widgets in the West Texasareas and we'll beat any competitor's price.</p>
Notice the syntax of the HTML tag. There is always and opening and a corresponding closing tag. Opening tags look like this <tag>, and closing tags like this </tag>. That's not so complicated, right? This is the first step to building a well formed, meaningful content layer for a web page. This is how a web designer should approach the information he or she is given to fill a web page. Before the style layer is applied, the content on the page should be organized and tagged in a coherent order. It should be organized in such a way that even without a style layer, it could be navigated and understood. It's very common for new web designers to use HTML tags to structure and layout the visual design of a web page. It's important to avoid this error. There are very few instances where it's necessary to us HTML tags to change the visual style of a web page. HTML tags should be used to describe content and separate content into logical blocks.
Creating an HTML Page
Now we get to the fun part. You can start by opening up MS Notepad or any other plain text editor. If you have an HTML editor already, it's fine to use that. Just understand it's not absolutely necessary that you have a fancy HTML editor. On the very first line copy and past line of code:
<!DOCTYPE html PUBLIC "-//W3C//DTD XHTML 1.0 Transitional//EN" "http://www.w3.org/TR/xhtml1/DTD/xhtml1-transitional.dtd">
This line simply tells the browser that the page it's displaying is an XHTML 1.0 transitional page. I won't elaborate any more on this line right now, but if you're interested in more about doc-type declarations, I wrote and article called HTML Transitional What? you might want to read. Next, add the opening and closing <html> tags. These tags wrap around all of the content on the page. there should be nothing before or after them (other than the doc-type declaration, of course). The result should look like this:
<!DOCTYPE html PUBLIC "-//W3C//DTD XHTML 1.0 Transitional//EN" "http://www.w3.org/TR/xhtml1/DTD/xhtml1-transitional.dtd">
<html xmlns="http://www.w3.org/1999/xhtml">
</html>
That funky code in the opening html tag (xmlns="http://www.w3.org/1999/xhtml") just declares that this page should be checked against the standards set forth by the W3C in 1999 concerning XHTML. Again, this is all just setting the page up so don't get too caught up in all this. Just a couple more formalities and you'll be ready to start adding content to the page. Next, you need to add the <head> tag and all the descriptive tags that go along with it. The <head> is an area of the page where you can describe the page and link up to any stylesheets or javascripts that the page might need. For now, you just need to put the basics: content type and page title. Here's what it should look like now:
<!DOCTYPE html PUBLIC "-//W3C//DTD XHTML 1.0 Transitional//EN" "http://www.w3.org/TR/xhtml1/DTD/xhtml1-transitional.dtd">
<html xmlns="http://www.w3.org/1999/xhtml">
<head>
<meta http-equiv="Content-Type" content="text/html; charset=utf-8" />
<title>A-1 Widget Makers</title>
</head>
</html>
That's it. The page is set up and ready for content. The content of the page that is visible to the visitor is wrapped in a <body> tag. Go ahead and add a <body> tag to the page and paste the HTML from the first example inside it. The final code should look like this:
<!DOCTYPE html PUBLIC "-//W3C//DTD XHTML 1.0 Transitional//EN" "http://www.w3.org/TR/xhtml1/DTD/xhtml1-transitional.dtd">
<html xmlns="http://www.w3.org/1999/xhtml">
<head>
<meta http-equiv="Content-Type" content="text/html; charset=utf-8" />
<title>A-1 Widget Makers</title>
</head>
<body>
<h1>The History of A-1 Widget Makers</h1>
<p>A-1 Widget Makers has beenfamily owned since 1943. We makethe best widgets in the West Texasareas and we'll beat any competitor'sprice.</p>
</body>
</html>
Pay close attention to the indentation. You'll notice that tags which are nested inside other tags are indented one tab. This helps keep the HTML code nice, neat ,and easy to read. Technically, you could take out all the carriage returns, tabs, and spaces and the browser would still render it the same way. But it would be very difficult to read and edit for you.
If you want to take a look at your first HTML page in action, first save the file as my_page.html. Then just open your favorite browser (hopefully not IE 6) and type in the address of the page you just saved. You can also go to File>>Open and navigate to it with the file browser. When you open it, you'll notice that the content header (the one wrapped in the <h1> tag) appears bigger than the rest of the text. This is because all browsers have default styles they apply to HTML tags. The page should look something like this:
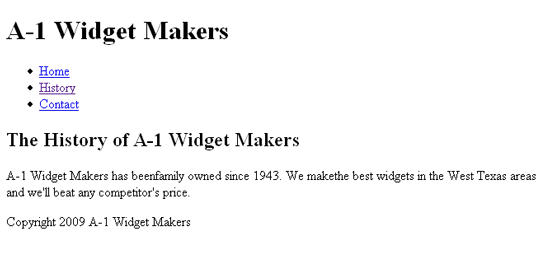
In the next article I'll explain how to override these styles with CSS. But for now I'm going to continue to expand on the content layer. At this point you have a web page that doesn't do anything. But the whole point of the "web" is that it links. Next, I'm going to walk through an example of a full-fledged web page with a header, navigation, content, and a footer.
You may be tempted at this point to jump ahead and start relying on a visual website editor. Don't do it! No visual editor can produce the clean, well organized HTML that you can by hand. And if you think it will be faster, think again. You'll spend more time trying to figure out why in the world this or that element won't align right than you ever would have if you had just learned how to do it right the first time.
Creating a "Real" HTML Page
Alright, we got all the setup stuff out of the way. It's time to move on to bigger things. Rather than adding each block of HTML one step at a time, the way I've been doing, this time I'm going to give you the full HTML code and then walk through it one step at a time.
<!DOCTYPE html PUBLIC "-//W3C//DTD XHTML 1.0 Transitional//EN" "http://www.w3.org/TR/xhtml1/DTD/xhtml1-transitional.dtd">
<html xmlns="http://www.w3.org/1999/xhtml">
<head>
<meta http-equiv="Content-Type" content="text/html; charset=utf-8" />
<title>A-1 Widget Makers</title>
</head>
<body>
<div id="header">
<h1>A-1 Widget Makers</h1>
<ul>
<li class="home"><a href="index.html">Home</a></li>
<li class="history"><a href="history.html">History</a></li>
<li class="contact"><a href="contact.html">Contact</a></li>
</ul>
</div>
<!-- header end -->
<div id="content">
<h2>The History of A-1 Widget Makers</h1>
<p>A-1 Widget Makers has beenfamily owned since 1943. We makethe best widgets in the West Texasareas and we'll beat any competitor'sprice.</p>
</div>
<!-- content end -->
<div id="footer">
Copyright 2009 A-1 Widget Makers
</div>
<!-- footer end -->
</body>
</html>
Header
I realize this is a lot to take in all at once so let's break it down and start with the header. The header of this web page is wrapped in a tag I haven't mentioned yet: the <div> tag. The <div> tag is a ambiguous tag denoting any "division" of content. In this case I am using it to mark off the beginning and end of the content at the top of the page (called a header). Since the <div> tag is non-specific I marked it by naming it "header" in the opening tag. This is what id="header" means. "header" is not a special keyword. I could have called it "top" or any other descriptive word (as long as there are no spaces in it). You may have also noticed some strange code right after the closing </div> tag: <!-- header end -->. This is a design comment. The browser completely ignores everything between "<!--" and "-->". I put it there so I can easily tell where my major blocks of content end. This is a practice I recommend getting in the habit of early.
The first tag inside of the header <div> is an <h1> tag. This tag is wrapped around the name of the company. There should only be on <h1> tag per web page and it should be wrapped around the most important headline on the page. In most cases the most important headline is the title of the entity represented by the website.
Next, you will see a big block of tags I haven't yet mentioned. This section is the navigation section. It's comprised of the links necessary to navigate around to the various pages on the website. The first tag is <ul>. UL stands for unordered list. You should use it any time you want to mark a list of items. In our case, it's a list of links, but it could be used for a list of books, a list of articles, names, dates, anything that's a list. Inside the <ul> tag are a number of <li> tags. LI stands for list item. These tags are used to mark the individual list items within the <ul> (unordered list). Check out The Amazing LI if you want to know more about list items. That's easy enough but you'll also notice that each list item is named according to its content. This is what class="home" means. Just like id, class is another way to give a particular HTML tag an identity. The only difference between the two is that an id name can only be used once per web page, while a class name can be used over and over. It's best to name unique structural blocks with ids and elements which may be reused with classes.
Finally, inside each <li> (list item) tag is a very important tag: the <a> tag. The <a> tag marks a link. Inside head opening <a> tag, you'll also notice an "href" attribute. Href tells the browser where the link should point. I went ahead and put in some imaginary page names (index.html, history.html, etc.) In order for these links to all work properly, there would have to be corresponding web page files all sitting in the same directory with the current page. That's it for the header, on to the content.
Content
The content <div> is nothing new. It's the same code from the previous example with a few minor changes. First, you'll notice that the content is wrapped in a named <div> tag with a comment marking the end of the <div> just like you saw in the header. Next, take a look at the <h> tag wrapping the headline. It's no longer an <h1> tag. It's now an <h2> tag. Remember, I mentioned that there should only be one <h1> tag per page? I already used up my <h1> in the header so now I move on to <h2>. There can be multiple <h2> tags on a single page. So, for example, I could have another <h2> tag after the first paragraph in the content section wrapping a title that said, "About Our Founder". Then below that would be another paragraph of content. If each of these paragraphs needed to be broken down further, I could move to <h3> tags to mark minor content titles between <h2>s. For more information on how to use <h> tags properly, go to The <h> Hierachy: Using Heading Tags the Right Way.
Footer
The footer is the easiest part. All I have there is a copyright notification. In most cases, though, there would be more down here. For example, I like to have the navigational links at the top and the bottom of the page lots of times. But for our purposes, this example with do.
Wrapping Up the Content Layer
I hope this overview has been helpful in painting the big picture. I've covered the HTML tags you will be using most often in web design. But, of course, there are a lot more HTML tags you need to learn. I recommend getting a small reference guide for XHTML and keeping it handy. You should also take a couple hours and at least skim it so you know what tags are out there. The next article in this series will cover the style layer. So don't close your text editor just yet, we're going to be writing some CSS. In the meantime, you can brush up on your HTML by purchasing a reference guide and reading these articles from the Mirificam Press archives:
- HTML Transitional What? | The Ins and Outs of HTML Document Type
- The <h> Hierarchy: Using Heading Tags the Right Way
- Pushing the Limits (Part 1): The Perfectly Semantic Three Column CSS Layout
- 16 Comments
- 16532 Views
Comments
Posted By: Edgar on 02/07/09
Thanks for the write up Matt. More and more people are using the web to learn html and i'm sure others will come and learn.
Posted By: Matthew Griffin on 02/07/09
Thanks, Edgar.
Posted By: online gambling craps on 06/11/09
Content is certainly the king! its knowledge the backbone to life.But a key factor you must take into consideration is that your content must be unique copying and pasting is not going to help your site in the long term. Write information in your own words can be great help.
Posted By: Kristine m. Zihala on 11/24/09
setting up sight